
As an Amazon affiliate, we earn from qualifying purchases.
Last Updated on December 6, 2023 by bluefuze
In this post we’re going to discuss building a garage pulley system from ceiling. This will include the 4 point pulley lift system, as well as a couple of other styles. While this post will focus on making your own pulley system, I’ll cut right to the chase – the most popular thing in this post is the option that’s already manufactured for you! This is the “Racor PHL-1R Pro HeavyLift 4-by-4-Foot Cable-Lifted Storage Rack” and it’s an engineered solution for those that just prefer installing something ready to go. It extremely well rated on Amazon, and is very easy on the walet.
- Adjustable - Mounts to any ceiling, adjust to angle ceilings with the built in nylon rings
- Durable - High strength steel allows you to lift up to 250 pounds
- Efficient - Raises and lowers by crank and includes all installation accessories
- Reliable - Steel cables allow for 8ft of vertical lift and securely locks into place
- Reclaim Your Garage - 16 sq feet of additional overhead storage space with the 4 ft X 4 ft design, making more room for the things you want to do
Now, onto the DIY version. In most residential garages, you’ll often find a lot of unused items that use up space and are hazards waiting to happen. Are you tired of tripping over these items, and want to reorganize your garage in a way more useful way?
Setting up a simple platform pulley system is one way to solve this and other garage issues, allowing you to conveniently access storage within the rafters. It’s another great storage option that you may not have thought of!
With a few readily available tools, you can set up a garage pulley system from the ceiling in a few short hours. Most of the construction happens entirely on the ground before being installed for use, and while the way it works is ingenious, it’s really quite simple to install!
Building Your Garage Pulley System from Ceiling
To start off, you will require:
- Wood for 2 wall pieces (1)
- Wood for platform (if doing platform style)
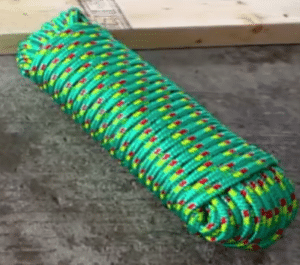
- Bundles of rope (2)
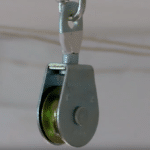
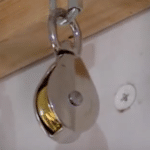
- Small Pulleys (3)
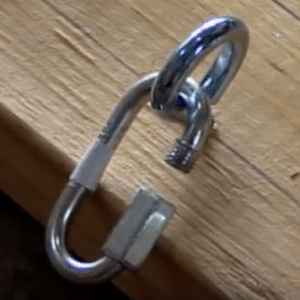
- Chain Connectors (screw together link joiners) (4)
- Rope Cleat Hooks (5)
- Wood screws (to screw in Cleat Hooks) (6)
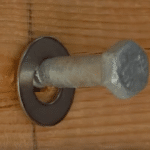
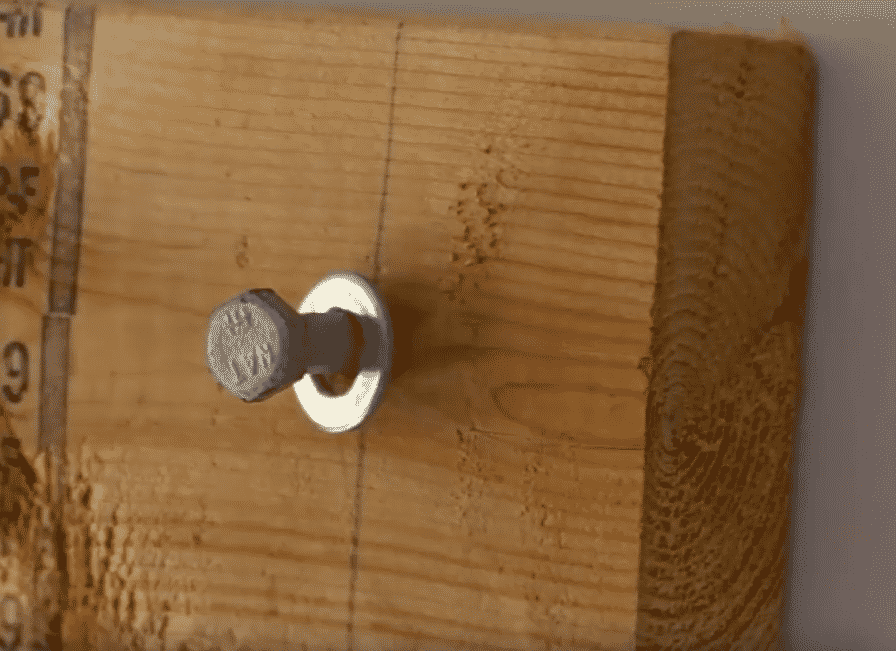
- Eye bolts (you might want the ones that screw in, so pointy tipped ones) (7)
- Screw Bolts (8)
- Washers to use with Screw Bolts (9)
Tools:
- Saw to cut 2×4’s
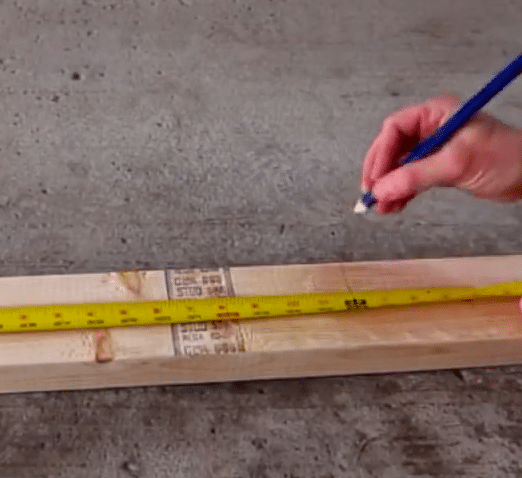
- Measuring tape
- Pencil
- Stepladder
NOTE:
The images used below in this article are screen-grabs from YouTube user “hamstergraphics” video below.
| 1 | 2 | 3 | 4 |
|---|---|---|---|
 |
 |
  |
 |
| 5 | 6 | 7 | 8 & 9 |
 |
 |
 |
  |
While some of the items in this checklist might be found in your garage, a good chunk will have to be sourced exclusively from hardware stores.
NOTE:
The strength of the ropes is one area you will want to pay special attention to; even as you work towards keeping the overall payload weight down, you will still need some basic assurance that the equipment will be up to the task. DO be sure to use ropes and other materials (pulleys) that are strong enough!
Before we start, here’s a great video primer we found. You should watch this video for this tutorial, as I will be referencing it throughout:
Getting Started
Once all the tools are set, start by measuring the plank(s) of lumber, then using a wood cutter of your choice, trim down the wood to an appropriate size.
The length of lumber depends on your intended storage platform, but in the video above I would estimate about 4 feet for each piece of wood (2). So an 8’ piece of 2×4 lumber could be cut in half for example. Whatever length, it will be times 2, so in this case, 2 pieces of 4’ 2×4 lumber.
If building a platform style system, you will need a some wood for your platform. A simple 4 x 8 rectangular sheet could be sufficient to serve basic needs. It depends on what size will work for you.
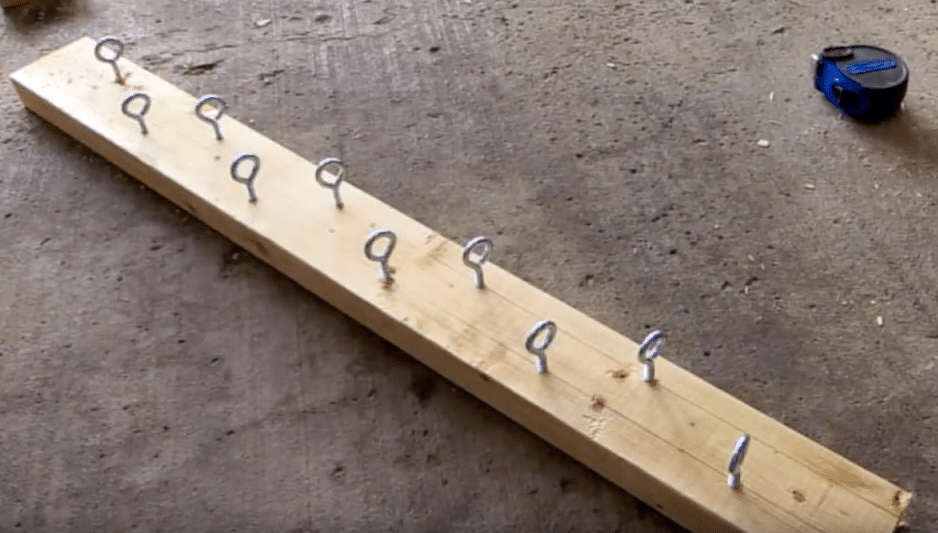
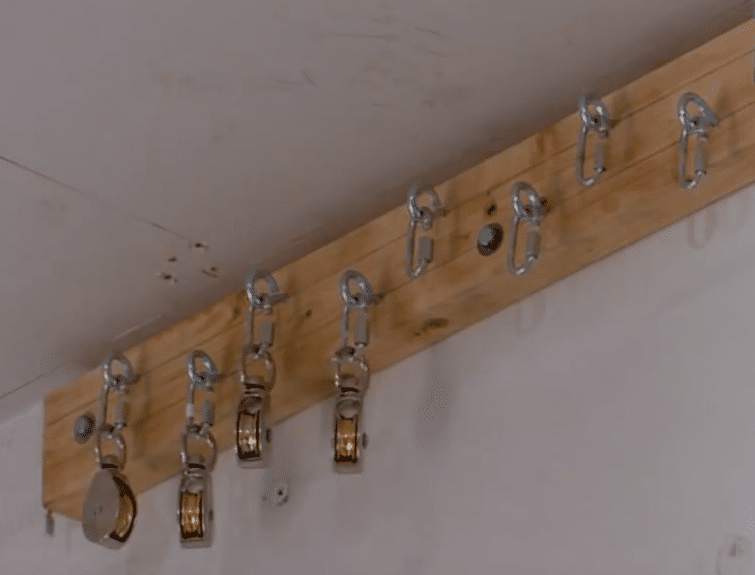
Then mark the areas where eye bolts will be attached. Eye bolts are lined up in two parallel rows, each at an alternating position to the other, like a zig-zag pattern.
An average of 12 eye bolts in the plank wood will do. Each eye bolt supports a pulley.
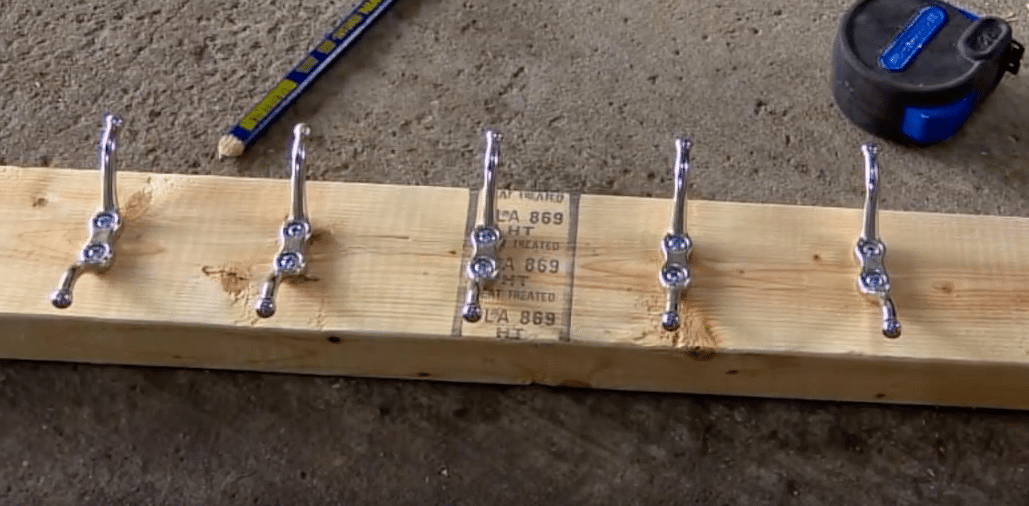
On the remaining plank of wood, fasten the appropriate number of rope supports around which the ropes will be wound. The supports correspond to the number of items or hoists you wish to store in the unused garage space.
Wall Mounting
The two planks of lumber are now ready to be mounted horizontally on the wall. Perhaps the easiest part of the entire procedure, you only need to screw them firmly into place after ensuring they are levelled off. Try to ensure that you are fastening them onto studs or solid supporting structure so that you can be confident they will be secure.
The plank of wood with fastened eye bolts is first up on the wall, preferably attached at the joint between the wall and the ceiling. The remaining piece, onto which the ropes will be tied, can be screwed at a comfortable operating height.
Pulleys can then be attached on the hooks hanging from the eye bolts. You can test the strength of the eye bolts at this juncture to ascertain that they won’t fail and cause harm.
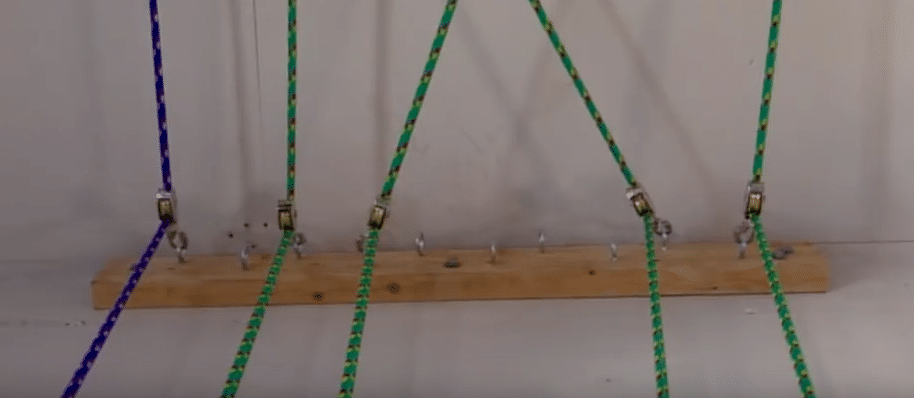

Adding the Rope
Once construction is completed, it is time to weave the ropes through the pulleys. If you will be hoisting several items using independent ropes, consider using different colors to avoid confusion. Some of the eye hooks can be left without pulleys for later installation.
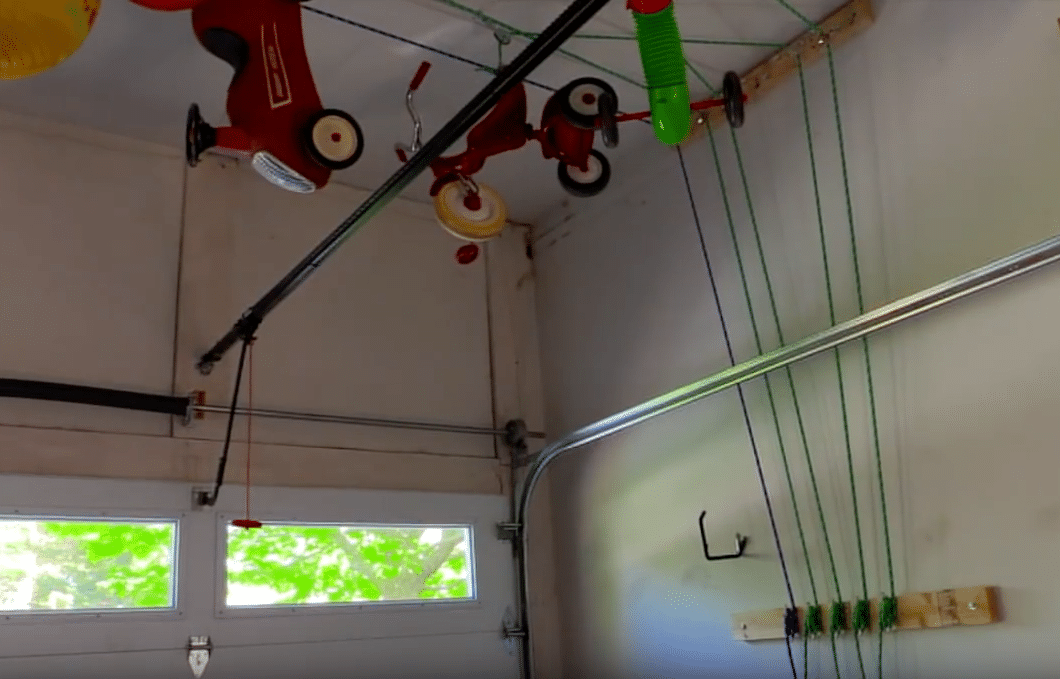
This system makes your storage so much more straightforward, taking all the clutter out of the way. Just be sure to carefully go through the tutorial, and observe the safety precautions, before hoisting your first item(s).
Setting Up a 4 Point Pulley Lift System (Optional Setup)
Everything so far has created the basics for a simple pulley system like the one seen in the video.
Like anything, there can be even more fancy or elaborate systems.
Below, I’ll discuss another style which is a “platform” style, supported by 4 points.
Here is a great video that shows the general idea. Now, in the case of the video they are supporting a Kayak on bars… but in our case, we would be attaching the rope to a flat platform instead of bars. The principals are all the same.
You will also notice in this video, the use of a nice little upgrade, and that is the Wall Mounted Hand Winch winder.
Dimensions guiding this 4 point lift system are dependent on your intended use. As they grow larger, so should the materials used to fasten the four pulleys. There are weight stipulations detailing how far they should be spaced for the best safety, and also pay attention to the weight ratings for each of the parts from the ropes, to the pulleys, to the support structures.
Here’s another really cool implementation that’s a bit unique, but great for inspiration!
NOTE:
When screwing the pulley lift system into place, avoid laminated rafters at all costs. They may be weakened severely and potentially lead to property damage or worse still, serious personal injury. Some common sense, and following the stipulated restrictions of the materials needs to be taken into account.
Storing Medium and Lightweight Items
Most items can be stored in high plastic bins or totes which should be labelled for easy organization.
If you’re using the platform method, you should create corner braces on the plywood, or a ridge border around the platform. In the event that items shift
For many domestic items (not too big or heavy), you could choose to dedicate a rope for each item without having to build an underlying platform for it. It depends a lot on the item. For example, in the main video you can see the child’s toy (which is light enough in weight) being held by one dedicated rope.
Prefer a Manufactured Solution?
Now, perhaps you’re not a big DIY person. Perhaps, you just want something that’s much easier, and ready to go out of the box (sure, with a bit of assembly required).
If that’s you, then you just might absolutely love this product:
- Adjustable - Mounts to any ceiling, adjust to angle ceilings with the built in nylon rings
- Durable - High strength steel allows you to lift up to 250 pounds
- Efficient - Raises and lowers by crank and includes all installation accessories
- Reliable - Steel cables allow for 8ft of vertical lift and securely locks into place
- Reclaim Your Garage - 16 sq feet of additional overhead storage space with the 4 ft X 4 ft design, making more room for the things you want to do
This is the “Racor PHL-1R Pro HeavyLift 4-by-4-Foot Cable-Lifted Storage Rack” and it’s an engineered solution for those that just prefer installing something ready to go. It quite well rated on Amazon, and is very easy on the walet.
Safety During Installation and Use
- During installation and use, automatic garage door operation should absolutely be terminated.
- It is extremely dangerous to try and hoist a person using this home-built pulley system.
- At all times, stick to the recommended weight limit.
- Be sure that the ropes are in good condition, with no signs of fraying which could weaken the strength and integrity.
- Use of any type of lift/hoist/pulley system, should never be done (lowered or raised) when a person it standing underneath the objects being moved, in case of any accidental falling objects or the platform itself.
- Make sure all equipment used is rated for the weights they will be subject to as a minimum, but it’s suggested to “overdo it” and get rope and other parts that well EXCEED the intended usage weight.
Before You Leave
Setting up your own garage storage system can be fun! You only have to source the right equipment and follow the easy installation procedure.
Are there any questions you still have regarding garage pulley systems? Leave a comment below.
Have you tried it out? Let us know about your pulley system!
You might enjoy one of our other most popular posts, How to Build a Workbench
Be sure to check out my other post on Organization:
Other Popular Posts: